Friday, September 1, 2006

Fuelish

Fuel Hoses, 9/1/2006

Recommendations from our surveyor were divided into three groups: Essential for safety/seaworthiness, Required by USCG regulations and/or ABYC, and Desirable/Cosmetic. Following the survey, BoatU.S. insurance required that we repair most of the deficiencies, including (strangely) many of those on the Desirable/Cosmetic list. I fought back on most of those in the last category, not because I won't make the repairs, but because I don't want my insurance to be contingent on cosmetic repairs. They yielded on most of them.

Among the most serious of the problems on the "Essential" list, however, were deteriorated fuel hoses which needed to be replaced with "type-A USCG-approved flame-retardent hoses". The before/after picture below shows one of the fuel line connections, and you can see that the original hose and crimp fitting (on the left) were in pretty bad shape. Although this type of repair probably isn't difficult, it is pretty serious, even for diesel fuel (which is far less explosive than gasoline). So, I elected to have Bristol Marine (at Shipwright, our marina) do the repair.


Bristol hasn't steered us wrong yet. They seem to do good work, and my only complaint is that they sometimes need repeated prodding before they get around to doing the requested work. That's pretty common in busy service yards, and certainly worth tolerating if the work is done right.

Tuesday, August 8, 2006

Ground Tackle

Anchor rode, August 2006

This is how you know the anchor rode (or at least the thimble) needs to be replaced. The thimble is so corroded that the shackle, which connects the thimble to the anchor chain, is stuck in one place and won't come off.

The double-braided line attached to the thimble is too old to be re-spliced on to a new thimble, so we've replaced the entire line with 200' of 1/2" three-strand line, new thimble, new shackle, and 20' of 1/4" chain. I'm partial to three-strand rather than double-braid; not quite as friendly on the hands, but I like how it looks and it has a bit more stretch, which is good for an anchor rode.

Tuesday, July 4, 2006

Cleanliness

The interior is clean and looking good! Michele did most of the cleaning while I worked on other repairs, and she did an amazing job. There was mildew everywhere, particularly on the carpeting along the v-berth walls. We really didn't want to sleep on the boat until the mildew was gone, and Michele worked hard to get it all done for the holiday weekend. She spent lots of time on the wood as well. What a difference!

Sunday, July 2, 2006

Instrument Bezels

Instrument Bezels, 5/2/2006

The instruments at the lower helm are in decent shape, except for the fact that some of them kept falling down inside the panel. They're designed so that they insert in the panel from below, and screw into the the plastic bezel ring above. The bezel then holds the gauge in place. The problem was that the bezels for two the smaller instruments were cracked, so they no longer held tight.

They're Volvo-Penta factory instruments, and I was able to get the bezels from Vosbury Marine in Annapolis. A cheap fix, for a change!

Saturday, July 1, 2006

Don't Get In Over Your Head: Call A Plumber

Faucets, Toilet, 7/1/2006

The title for this post is an inside joke. Clue will recognize it...

Based on my experience, plumbing problems seem all too common on boats. I spent months trying solve some plumbing problems on our first boat (Mariner) in Seattle, and faced problems right away with Mariner II. The galley faucet was broken, the head faucet was broken, and the toilet wouldn't flush. Two-for-two boats with plumbing problems, and three-for-three fixtures on this boat. I replaced the two faucet fixtures right away, as running water is pretty important for us to enjoy the boat. Generally you can get "rebuild kits" for marine toilets at about 1/3 the cost of a new toilet, and then just rebuild the flush pump. I might have done that, but since the toilet was 20 years old and looking kind of dingy and gross, I just replaced that as well. The floor mounts didn't line up exactly (of course), so I'll have to plug the screw holes in the floor.

And then there's the little issue of tracking down the leaks in the system, but that's a story for another day.

Saturday, June 3, 2006

Charged Up

Battery Charger, June 2006

We'll be keeping the boat in the water, so I want the bilge pump always at the ready in case there is any serious leak. The pump runs off the house battery, so the battery needs to stay charged even while the engine is not running. With many projects ahead, I took a simple approach for this to get it out of the way quickly. I installed a very basic Guest 2611A, 10-amp, 2-bank charger that plugs into an electrical outlet. Installation is easy: connected the positive and negative leads to each battery, plug it in, and turned on the shore power. The only hard part was finding a suitable location to mount the charger. It's air cooled, relying on passage of air behind the base. As a result, it's best to mount them on a vertical surface, but horizontal will do in a pinch. In a pinch, I installed it horizontally, on the floor of the storage area behind the battery switch.

Wednesday, May 31, 2006

Keep The Water On The Outside, Part 1: Seacocks

Seacocks, 5/31/2006

Virtually every boat has holes in the hull. That sounds bad, but it's not. Many systems need a constant flow of seawater, so a thru-hull fitting below the waterline provides this flow via a seacock and hose. A seacock is simply a valve that protects the boat from flooding in case the hose fails. Open the valve, full water flow. Close the valve, no water.

Over time, it's fairly common for seacocks to become stuck (or "frozen") if they aren't maintained or at least operated regularly. In our case, the prior owner kept the boat on a lift, so he never closed the seacocks. As a result, our engine and head intake valves were frozen in the open position, which is not safe.

Cape Dory is known for rugged construction and quality components. Much of Cape Dory hardware, including the seacocks, came from Spartan Marine in Georgetown, Maine (the original home of Cape Dory). Sometimes, that quality has its drawback (read: "price"). I learned this very early on, when restoring these seacocks to operating condition. I briefly contemplated replacing the seacocks. Very briefly. Bronze is obviously not cheap, but the $238.00-per-seacock price tag made a repair effort seem like a great idea.

In the end, the repair work was not that difficult. While the boat was out of the water for bottom painting, I soaked and scrubbed them with CLR to remove lime deposits and WD40 to loosen them up. Eventually I was able to get them moving again, enough to suffice for the first season, and plan for more complete maintenance at next haulout. Now that the seacocks are functional, I've made it a habit to close them every time we leave the boat overnight. I sleep much better knowing that sturdy bronze fittings, rather than rubber hoses, are protecting the boat while I'm away.

Tuesday, May 30, 2006

Bottoms Up

Bottom Paint, Bootstripe, 5/30/2006

The prior owner kept the boat on a lift, so never had a need for bottom paint. His maintenance records show that when he acquired the boat in 1996, he had a few minor bottom blisters repaired and had an epoxy barrier coat applied. That's a great benefit and works well to prevent future blisters.

Now that the boat will be in the water 7 months each year, it needs antifouling paint to prevent marine life (barnacles, algae, etc) from growing unchecked on the hull. Bristol Marine hauled her out during our first week, and applied the paint. They also installed a new zinc anode on the propshaft and repaired some gelcoat damage along the starboard side. The repair (of course) required repainting the entire bootstripe (the blue stripe along the waterline).

Monday, May 29, 2006

Drop The Charges

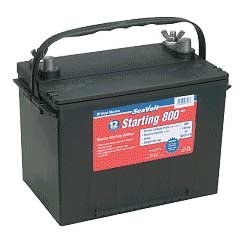
Battery System, 5/28/2006

[Note: backdated this post to reposition in chronological order.]

One more maintenance/repair post, then I promise to write about one of our weekend cruises last summer. I say that as if someone is actually reading this, and actually cares. ;-)

Our pre-purchase surveyor cautioned me about the battery system. There was a problem getting voltage, and it wasn't clear why. We sea-trialed ok, though, so I felt we could address the problem after taking delivery Memorial Day weekend 2006. Oops.

My friend Chris was visiting from Tennessee, and I was glad for the help to bring the boat home. Saturday of Memorial Day weekend arrived and Chris, Michele and I set out to pick the boat up at the prior owner's home. He was away for the weekend, but gave us permission to take her away while he was gone. Guess what, no power. We struggled for a little while and then gave up, resolved to return on Sunday and gut the battery system. We did just that: replaced both batteries, the battery switch, all battery cables, and the ground wire. It took all day and three trips to four different marine supply stores, but shortly after 4pm, the big old diesel engine roared to life.

In the next few minutes, I made a very risky decision. On a Sunday of a holiday weekend, with evening approaching and a 3 hour trip ahead of us, in an unfamiliar boat, in unfamiliar waters, navigating solely by compass and charts, Chris and I cast off and set a course for Shipwright Harbor, our boat's new home.

Fortunately, sunny and mostly calm weather made for a really nice cruise, and we made it with no real problems. Our only struggle was finding red #2 in Herring Bay, but eventually we got in ok and Michele was waiting for us at the slip, ready to catch our lines. We tied up, covered the boat, and headed over to Skipper's for dinner and margaritas. The bartender welcomed us to the neighborhood with a couple complimentary tequila shots, a gesture we surely won't forget!